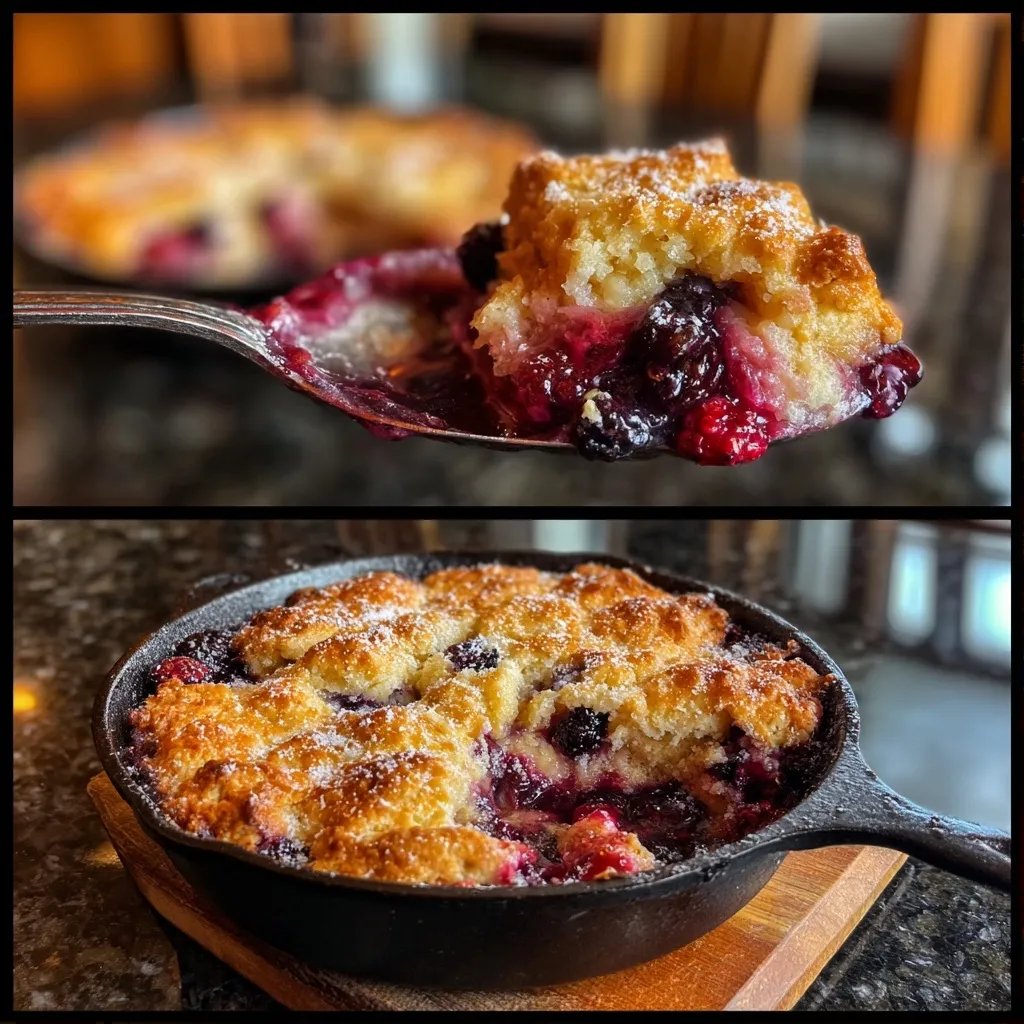
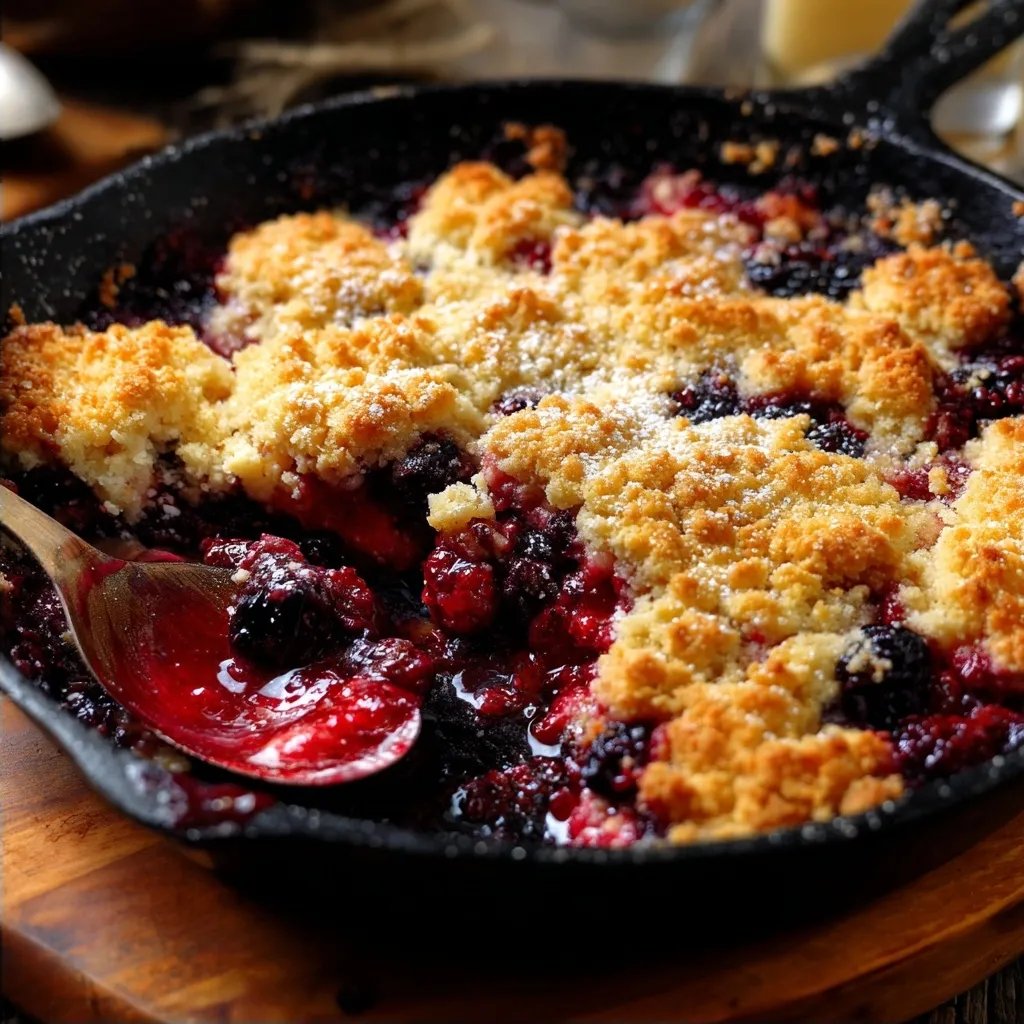
Berry Cobbler Cast Iron
Highlighted under: Sweet Treats
Late summer, fruits are bursting with sweetness, and I just can’t resist making a berry cobbler. It’s a simple dessert that brings everyone together, especially during our backyard barbecues. I remember the first time I tried making it in my cast iron skillet, and my family was smitten. This recipe is not only quick to throw together but also wraps the flavors of ripe berries in a cozy, buttery topping that feels like a warm hug.
One time, I really messed up while making this cobbler. I was in a rush and accidentally grabbed baking powder instead of baking soda. The texture was all wrong and way too dense. When my partner took a bite, he tried to be polite but I could see the confusion on his face. I learned to double-check my ingredients from then on!
This recipe has turned into a favorite for weekend gatherings. When I make it, I always choose whatever berries are fresh at the market—strawberries, blueberries, raspberries, or even peaches tossed in. Everyone fills their plates and asks for seconds, which is honestly the best compliment I could ask for.
What I Love About This
- Using seasonal fruit means it always feels fresh
- The cast iron gives a great crispy texture to the topping
- It's super easy to make even if you’re short on time
Key Technique for Berry Cobbler Cast Iron
The cast iron skillet really helps achieve that crispy texture on top, which is something I adore about this cobbler. It's important to preheat the pan slightly before pouring in the filling. This little trick can help the crust set up nicely and gives those edges a lovely crisp. If you’re not super comfortable with cast iron, using a regular baking dish works just fine too, but the texture might slightly change.
Remember to not overmix the topping batter. Just combine until everything is nicely mixed, and don’t fret if it looks a bit uneven. A lumpy batter can actually create more interesting textures when it bakes - giving you that nice contrast between the soft filling and the crispy topping.
Swaps & Substitutions
If you’re short on fresh berries, frozen ones do the trick, but be sure to drain any excess liquid to avoid a soggy cobbler. You can also change up the berries based on what you have. Maybe swap strawberries for blackberries or toss in some peaches. The sugar amount might need adjusting depending on fruit sweetness, so taste as you go.
And if you’re looking for a lighter option, you could try substituting half the butter in the topping with applesauce. Just note that this will change the overall texture a bit but can work great if you’re in the mood for something less rich.
Ingredients
Gather these ingredients to create your berry cobbler:
For the filling
- 4 cups mixed berries (strawberries, blueberries, raspberries)
- 1/3 cup granulated sugar
- 1 tablespoon lemon juice
- 1 tablespoon cornstarch
For the topping
- 1 cup all-purpose flour
- 1/2 cup granulated sugar
- 1/2 teaspoon baking powder
- 1/4 teaspoon baking soda
- 1/4 teaspoon salt
- 1/2 cup unsalted Kerrygold butter, melted
- 1/2 cup milk
Once you have everything ready, it's time to get cooking!
Instructions
Follow these steps to make your cobbler:
Prepare the filling
In a mixing bowl, combine the berries, sugar, lemon juice, and cornstarch. Gently stir until the berries are coated. Let this sit for a few minutes while you prepare the topping. If you're using frozen berries, thaw them beforehand and drain any excess liquid.
Make the topping
In another bowl, whisk together the flour, sugar, baking powder, baking soda, and salt. Then, pour in the melted butter and milk, mixing until you have a smooth batter. Don’t worry if it’s a bit lumpy, it’ll turn out fine.
Combine and bake
Preheat your oven to 350°F (175°C). In a greased 10-inch cast iron skillet, pour the berry mixture on the bottom, then dollop the batter on top. Don’t stress about making it look pretty, just spread it around as best you can. Bake for about 30-35 minutes, or until the topping is golden brown and a toothpick comes out clean.
Cool and serve
Once it’s out of the oven, let it cool for about 10 minutes before serving. This cobbler is delicious on its own, but if you’re feeling fancy, a scoop of vanilla ice cream on top is never a bad idea. You’ll want to dig right in!
Enjoy your slice of warm berry goodness!
Pro Tips
- If your cobbler seems too runny, you might have added a bit too much juice from the berries; a touch more cornstarch should help next time.
- Feel free to mix and match berries based on what’s in season—blackberries would be wonderful too.
- Leftovers can be stored in the fridge and taste great reheated, or even cold right out of the container. No judgment here!
Troubleshooting
If your cobbler is looking a bit too gooey when you pull it out of the oven, it may need a little more time to bake. The key is watching for that golden color on top and checking with a toothpick. If it comes out clean, you’re good. If not, pop it back in for another five minutes. I’ve sometimes forgotten to add enough cornstarch, leading to a runnier filling, so don’t skip that part!
On the flip side, if the topping is browning too quickly but the filling isn’t set, you can cover it loosely with foil until everything cooks through. Timing can vary based on your oven, so keeping an eye on it is really helpful.
Berry Cobbler Cast Iron Variations Worth Trying
For a bit of a twist, consider adding a sprinkle of cinnamon or nutmeg to the topping. These spices can add a cozy warmth that pairs beautifully with the fruit. If you’re feeling adventurous, you can even fold in some nuts for an added crunch – think pecans or walnuts mixed right into the batter before it’s poured over the fruit.
You can also play around with the types of milk in the topping. Almond or oat milk can work quite nicely, and they sometimes give a nice hint of additional flavor. If you’re in the mood for a sweeter treat, drizzle a bit of honey over the top before serving, or add a sprinkle of powdered sugar for presentation.
Questions About Recipes
→ Can I use frozen berries?
Yes, but I recommend thawing and draining them first to avoid excess liquid, unless you want a wetter cobbler.
→ How do I know when it’s done?
Keep an eye on the topping; it should be golden brown and a toothpick inserted in the center should come out clean—no soggy bits.
→ What if I don't have a cast iron skillet?
You can definitely use a regular baking dish, just adjust the baking time a little since it might not hold heat as well.
→ Can I add other fruits?
Absolutely! Peaches or chopped apples would be great additions. Just adjust the sugar based on the sweetness of the fruit.
Berry Cobbler Cast Iron
What You'll Need
For the filling
- 4 cups mixed berries (strawberries, blueberries, raspberries)
- 1/3 cup granulated sugar
- 1 tablespoon lemon juice
- 1 tablespoon cornstarch
For the topping
- 1 cup all-purpose flour
- 1/2 cup granulated sugar
- 1/2 teaspoon baking powder
- 1/4 teaspoon baking soda
- 1/4 teaspoon salt
- 1/2 cup unsalted Kerrygold butter, melted
- 1/2 cup milk
How-To Steps
In a mixing bowl, combine the berries, sugar, lemon juice, and cornstarch. Gently stir until the berries are coated. Let this sit for a few minutes while you prepare the topping. If you're using frozen berries, thaw them beforehand and drain any excess liquid.
In another bowl, whisk together the flour, sugar, baking powder, baking soda, and salt. Then, pour in the melted butter and milk, mixing until you have a smooth batter. Don’t worry if it’s a bit lumpy, it’ll turn out fine.
Preheat your oven to 350°F (175°C). In a greased 10-inch cast iron skillet, pour the berry mixture on the bottom, then dollop the batter on top. Don’t stress about making it look pretty, just spread it around as best you can. Bake for about 30-35 minutes, or until the topping is golden brown and a toothpick comes out clean.
Once it’s out of the oven, let it cool for about 10 minutes before serving. This cobbler is delicious on its own, but if you’re feeling fancy, a scoop of vanilla ice cream on top is never a bad idea. You’ll want to dig right in!
Extra Tips
- If your cobbler seems too runny, you might have added a bit too much juice from the berries; a touch more cornstarch should help next time.
- Feel free to mix and match berries based on what’s in season—blackberries would be wonderful too.
- Leftovers can be stored in the fridge and taste great reheated, or even cold right out of the container. No judgment here!
Nutritional Breakdown (Per Serving)
- Calories (kcal): 280
- Total Fat (g): 12.5
- Saturated Fat (g): 7.5
- Cholesterol (mg): 30
- Sodium (mg): 175
- Total Carbohydrates (g): 40.2
- Dietary Fiber (g): 3.1
- Sugars (g): 20.5
- Protein (g): 3.5