No Bake Granola Bars
Highlighted under: Quick & Easy
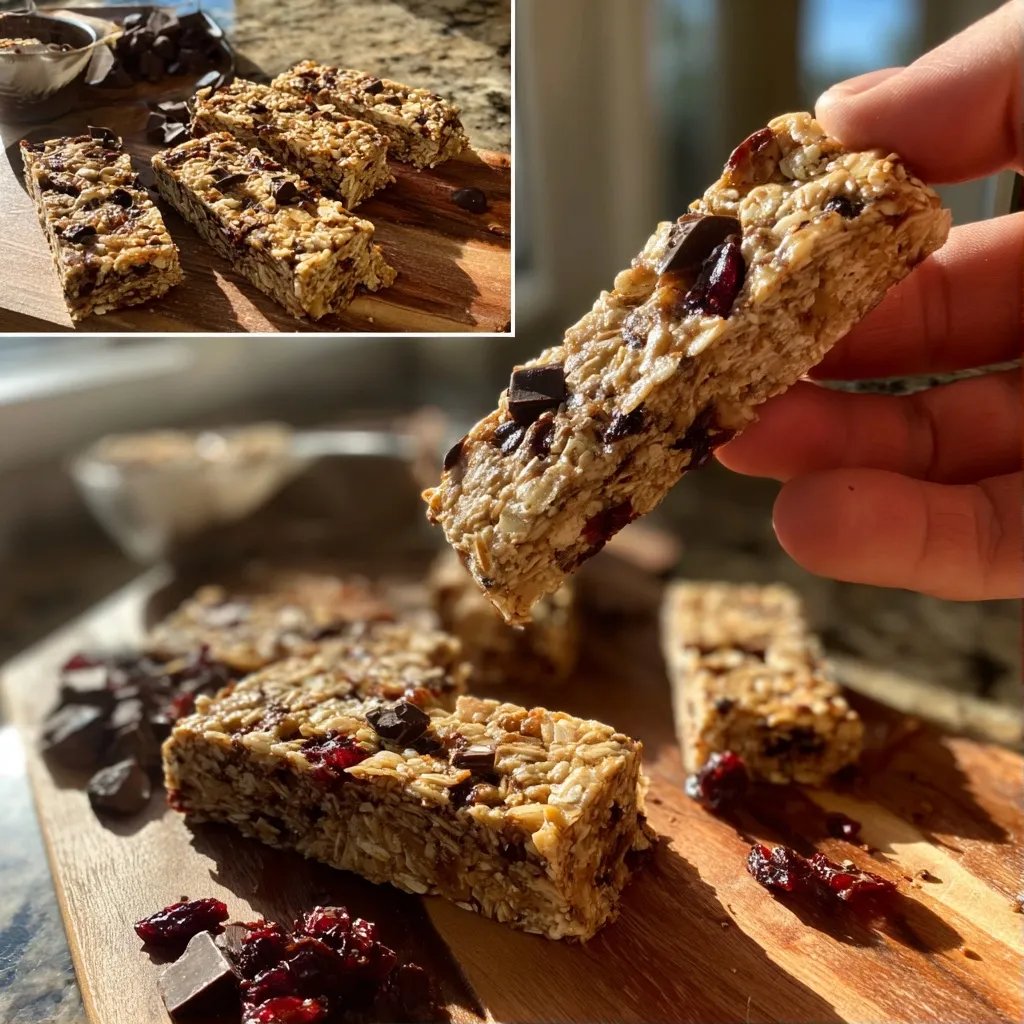
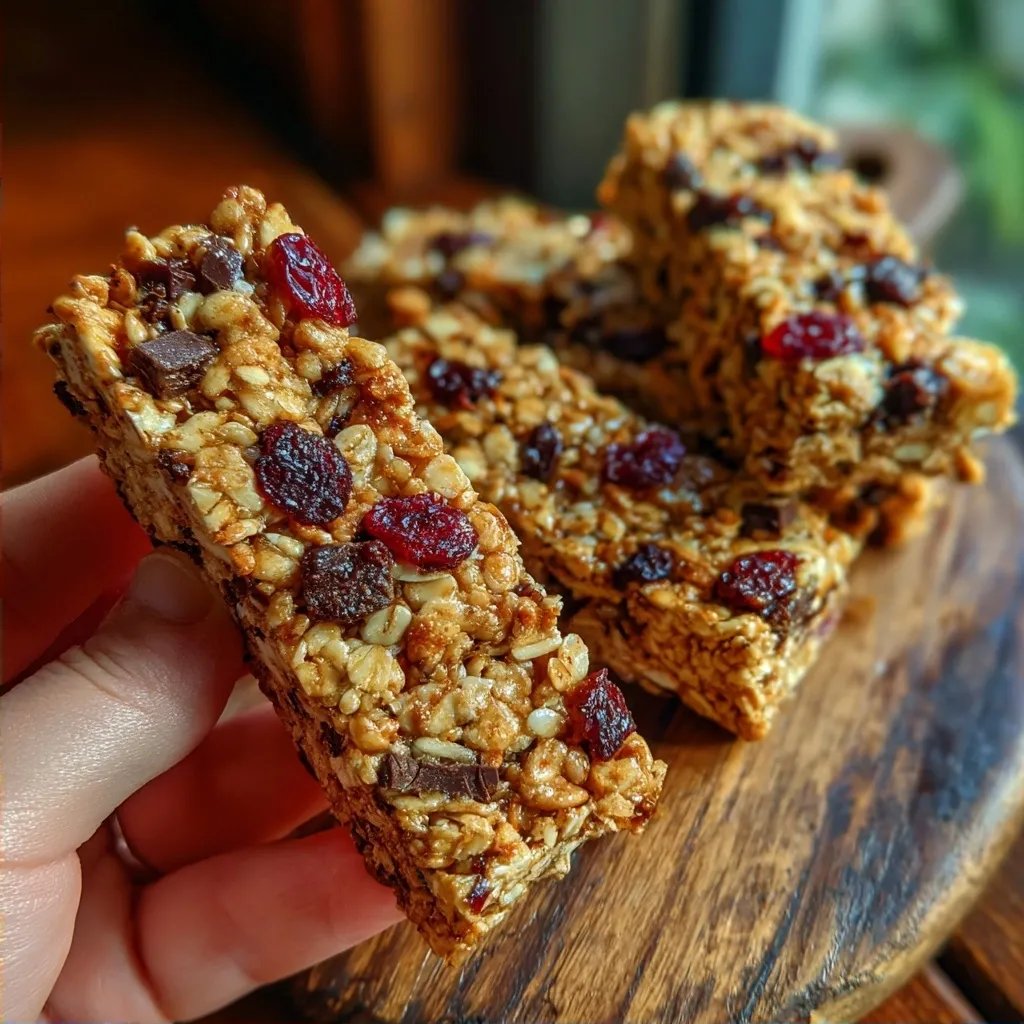
Crispy on the outside, chewy on the inside, and bursting with all the good stuff you love. These no bake granola bars have that perfect balance of sweet and nutty, making them a fantastic snack. They’re quick to put together and fit right into my busy days, not to mention they are endlessly customizable. I often find myself sneaking a bite before they even set, just to see how they taste. So, let’s get into this easy recipe that has become a staple in our house!
I started making no bake granola bars as a way to have an easy snack ready for the kids after school. They always need something quick, and I’d rather have them grab something homemade than a bag of chips. Plus, they get to help me mix it all together, which means extra fun in the kitchen.
What I love about these bars is that you can toss in whatever extras you have on hand. Once, I used almond butter instead of peanut, and it turned out great! Just remember, the mix needs to hold together, so adjust the ingredients a bit if you want to swap things out.
The Best Part
- They are super easy to customize based on what you have
- No baking means less fuss and less mess
- They stay fresh in the fridge for a long time
Getting the Texture Right for No Bake Granola Bars
Getting that crispy feel on the outside while keeping the inside chewy can be a bit tricky, but it all comes down to the mixing. When you combine the oats and nut butter, you want a good consistency that holds together without being too sticky. If it feels too wet while mixing, just add a bit more oats. I’ve done this many times when I didn’t measure perfectly, and it always works out.
Also, pressing the mixture into the dish is key. If you’re just lightly patting it down, chances are your bars might crumble apart later. Use both your hands and a spatula to pack it in there firmly. A good press can make all the difference in textural integrity when you slice them later.
Ingredient Notes
Choosing your nut butter can really change things, depending on your taste. I usually stick with Jif creamy peanut butter because it’s smooth and blends easily, but almond butter or sunflower seed butter can also work if you're looking for nut-free options. Just keep in mind the flavor might shift a bit, so choose something you enjoy. You can even use a crunchy nut butter for an added texture.
As for sweeteners, honey and maple syrup are great options, but feel free to experiment! Brown rice syrup or agave can work too if you have those on hand. If you want a less sweet bar, just reduce the amount you add. It’s super forgiving, and I’ve often adjusted based on what I felt like at the moment, with no complaints.
Ingredients
Here's what you'll need:
Ingredients
- 2 cups rolled oats
- 1 cup nut butter (I prefer Jif creamy peanut butter)
- 1/2 cup honey or maple syrup
- 1/2 cup mini chocolate chips
- 1/2 cup chopped nuts (almonds or walnuts work well)
- 1/4 cup dried fruit (cranberries or raisins are great)
Add or replace any ingredients you like.
Instructions
Follow these simple steps:
Mix the Base
In a large bowl, combine the rolled oats, nut butter, and honey. Stir it all together until it's really well mixed. I usually use a wooden spoon, but a spatula works too. If it's feeling too sticky, add a bit more oats.
Add the Extras
Next up, throw in the chocolate chips, chopped nuts, and dried fruit. This part is fun because you can really make it your own. If you want it extra sweet, maybe add a few more chocolate chips! Just make sure everything is well-coated with the mixture.
Form the Bars
Line an 8x8 dish with parchment paper for easy removal later. Then dump your mixture in there, pressing down firmly with your hands or a spatula. Seriously, press hard so they stick together; otherwise, you’ll end up with granola crumbles instead of bars.
Chill and Cut
Pop the dish in the fridge for about 2 hours, or until they firm up. When ready, lift out the parchment paper and cut into bars with a sharp knife. Honestly, I just use my hands to break them apart if they’re soft – they don’t have to be perfect.
Enjoy your snacks and feel free to share, though you might not want to!
Pro Tips
- You can use any nut butter you like; almond or sunflower seed butter work great too.
- If you're in a hurry, you can chill them in the freezer for about 30 minutes instead of the fridge.
- I often double the recipe because they disappear fast.
What to Serve with No Bake Granola Bars
These granola bars can be enjoyed on their own, but they also pair really well with a side of fresh fruit or yogurt for a wholesome breakfast. I sometimes grab one along with a banana when I’m rushing out the door. They’re also nice with a cup of coffee or tea in the afternoon as a quick pick-me-up.
For a little fun twist, try crumbling a bar on top of your morning oatmeal or smoothie bowl. It adds a nice crunch and a bit more substance to your breakfast. Plus, it makes for a more filling meal if you’re looking for something hearty.
Make-Ahead Tips
Making these bars ahead of time is really easy, and they store well in the fridge for about a week. I like to keep a stash for those busy days when cooking feels like a mountain to climb. You can also double the recipe and freeze half if you think you won’t go through them quickly. Just wrap them tightly in plastic wrap and store in an airtight container.
If you’re not quite ready to slice them after chilling, you can simply leave the whole bar until you're ready to cut them. I’ve done that before when I got sidetracked making dinner. They still cut nicely, and I usually end up just breaking off a piece with my hands, no fancy slicing necessary.
Questions About Recipes
→ Can I swap out the honey?
Yeah, maple syrup is a great alternative if you're looking for something vegan. Just keep the ratio the same.
→ Do I have to use chocolate chips?
You don’t have to! If you’re feeling healthy, you can leave them out or substitute with dark chocolate chips.
→ How long do these bars last?
They usually can last about a week in the fridge, but they rarely stick around that long in my house!
→ Can I freeze these?
Definitely! Just wrap them in plastic wrap and pop them in a freezer bag. They’ll keep for about a month.
No Bake Granola Bars
Created by: The Simplecooktips Team
Recipe Type: Quick & Easy
Skill Level: Easy
Final Quantity: 12 bars
What You'll Need
Ingredients
- 2 cups rolled oats
- 1 cup nut butter (I prefer Jif creamy peanut butter)
- 1/2 cup honey or maple syrup
- 1/2 cup mini chocolate chips
- 1/2 cup chopped nuts (almonds or walnuts work well)
- 1/4 cup dried fruit (cranberries or raisins are great)
How-To Steps
In a large bowl, combine the rolled oats, nut butter, and honey. Stir it all together until it's really well mixed. I usually use a wooden spoon, but a spatula works too. If it's feeling too sticky, add a bit more oats.
Next up, throw in the chocolate chips, chopped nuts, and dried fruit. This part is fun because you can really make it your own. If you want it extra sweet, maybe add a few more chocolate chips! Just make sure everything is well-coated with the mixture.
Line an 8x8 dish with parchment paper for easy removal later. Then dump your mixture in there, pressing down firmly with your hands or a spatula. Seriously, press hard so they stick together; otherwise, you’ll end up with granola crumbles instead of bars.
Pop the dish in the fridge for about 2 hours, or until they firm up. When ready, lift out the parchment paper and cut into bars with a sharp knife. Honestly, I just use my hands to break them apart if they’re soft – they don’t have to be perfect.
Extra Tips
- You can use any nut butter you like; almond or sunflower seed butter work great too.
- If you're in a hurry, you can chill them in the freezer for about 30 minutes instead of the fridge.
- I often double the recipe because they disappear fast.
Nutritional Breakdown (Per Serving)
- Calories (kcal): 150
- Total Fat (g): 7.3
- Saturated Fat (g): 1.2
- Cholesterol (mg): 0
- Sodium (mg): 94
- Total Carbohydrates (g): 19.5
- Dietary Fiber (g): 2.3
- Sugars (g): 7.5
- Protein (g): 4.5