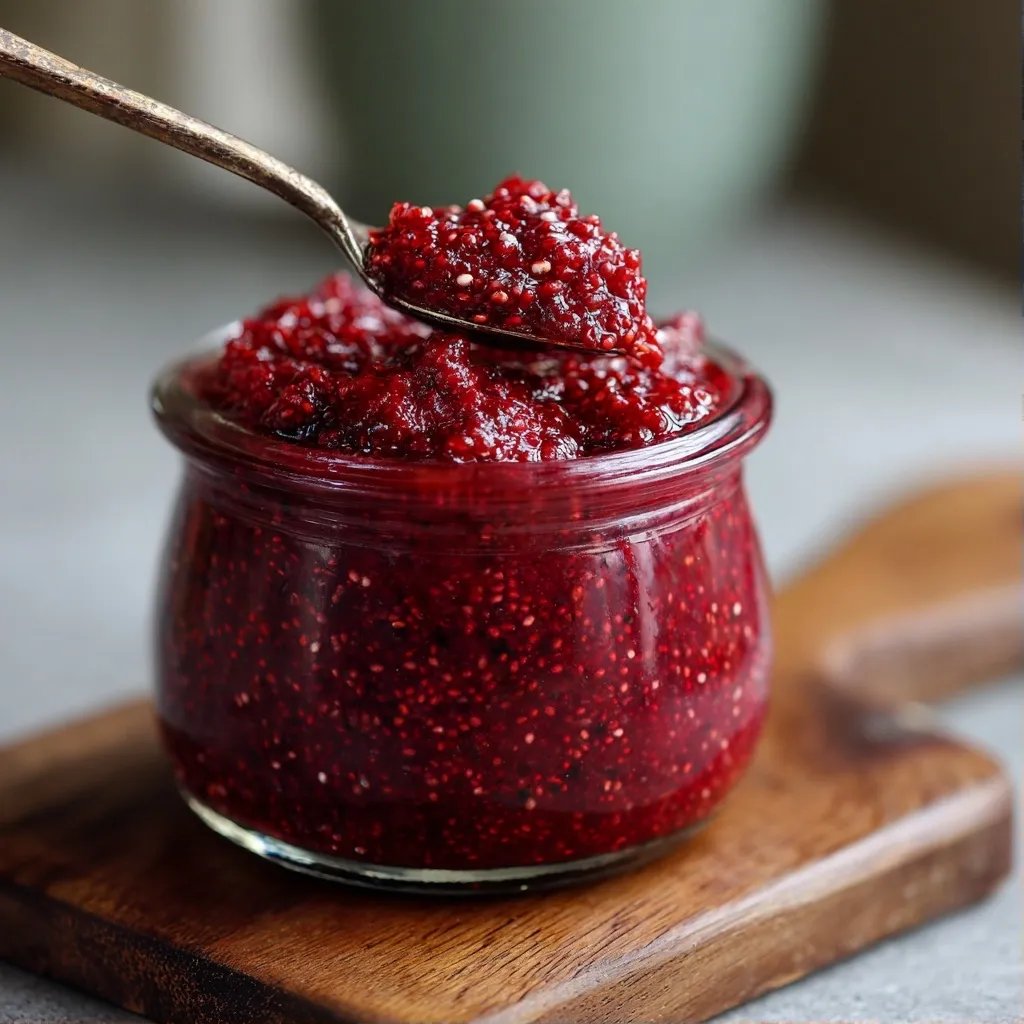
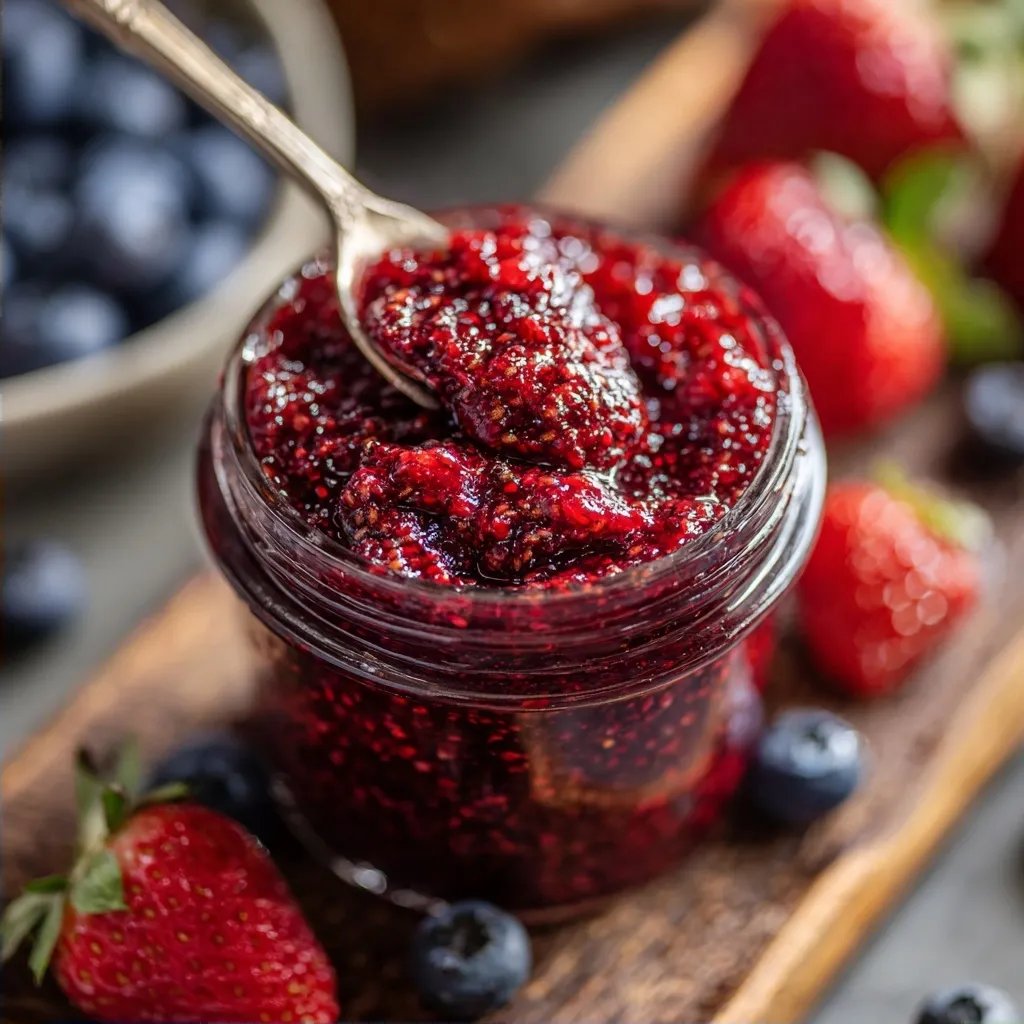
Summer Berry Chia Jam
Highlighted under: Sweet Treats
Last summer, I found myself with a surplus of berries from our local farm stand, and I wanted to do something special with them. So, I decided to make chia jam, which turned out to be a delightful way to enjoy the taste of summer all year round. It wasn't just about preserving fruit, but also about creating something healthy and tasty that I could spread on toast or swirl into yogurt. I remember my partner raving about it, especially after he accidentally made a peanut butter and jam sandwich with a ridiculously thick layer.
Initially, I didn't think making jam would be so straightforward. I ended up burning the first batch because I got distracted scrolling through my phone. Once I realized what was happening, I had to start from scratch. That little mishap taught me to pay attention during the cooking process, especially when you’re trying to reduce the mixture down.
After that, I found the right balance between sweetness and tanginess, and the best part was how little sugar I needed to bring out the berry flavors. It became a staple in my kitchen, and now, every summer, I look forward to this jam as a reminder of sunny days.
What I Love About This
- Super simple to make with just a few ingredients
- You can mix and match berries depending on what's fresh
- I feel good about the healthy ingredients
Key Technique for Summer Berry Chia Jam
The key to making this chia jam is the texture of the berries. When you're mashing them, it's good to aim for a slightly chunky consistency. This way, you can really taste the berries in the finished jam, rather than having it feel like just a syrup. If you find your berries are particularly juicy, you might need to cook them a touch longer to help thicken things up.
Cooking the berries over medium heat is also crucial. You want to get them to a gentle boil without scorching, checking in regularly. Stirring helps develop the flavors and eliminate any sticking at the bottom of the pan. I often multitask here, cleaning up my mess or prepping jars while keeping an eye on the jam.
Swaps & Substitutions
Don't fret if you don't have all the berries on hand. This recipe is pretty adaptable, so if you only have strawberries or just blueberries, go ahead and use them. I sometimes even throw in a bit of kiwi or peach when I have extras! If you’re looking to cut back on sugar, you can use less honey or maple syrup, especially if your berries are sweet enough on their own.
A little lemon juice is needed here to brighten everything up. Some folks prefer using lime or even orange juice, which brings a different twist to the jam. I’ve tried both and they add their own unique taste, so feel free to play around with what you have on hand.
Ingredients
Gather these simple ingredients:
Ingredients
- 1 cup fresh berries (strawberries, blueberries, raspberries, or a mix)
- 2 tablespoons chia seeds
- 2 tablespoons honey or maple syrup (adjust based on berry sweetness)
- 1 tablespoon lemon juice
That's all you need to get started!
Instructions
Here’s how to make this jam:
Prepare the Berries
Wash and lightly mash the berries with a fork in a medium saucepan. You can leave them a bit chunky if you like some texture, but make sure they’re broken down enough to release their juices.
Cook the Berries
Over medium heat, add the mashed berries to the pan. Stir in the honey or maple syrup and lemon juice. Bring this mixture to a gentle boil and keep stirring for about 5 minutes, or until it starts to thicken up a bit.
Add Chia Seeds
Remove the pan from heat and stir in the chia seeds. They will help thicken the jam and give it that nice gel-like consistency. Let it sit for about 10 minutes to allow the chia seeds to absorb the liquid.
Store the Jam
Once it's cooled down, transfer the jam into a clean jar. You can enjoy it right away, but it's even better after chilling in the fridge for a few hours. It should keep well for up to two weeks.
Enjoy your homemade berry jam!
Scaling Summer Berry Chia Jam for a Crowd
If you want to make a larger batch for a picnic or to share with friends, just multiply the ingredients accordingly. Keep in mind that cooking time might vary slightly if you make a larger quantity, so be ready to adjust. A good rule of thumb is to taste it as it simmers, adding more honey or lemon juice based on your preference.
I often find that if I make a big batch, it can sometimes take longer to thicken. Just be patient and keep stirring. Also, pouring the jam into smaller jars might be a fun way to share. It’s such a sweet gift, especially with a little ribbon around it.
Questions About Recipes
→ Can I use frozen berries?
You can, but they might make the jam a bit more watery. Just drain any excess liquid after they've thawed.
→ What if I don't have chia seeds?
Honestly, I skip this half the time, but if you can't find chia seeds, you could use ground flaxseeds instead, although it will change the texture a bit.
→ How do I know when the jam is ready?
You'll get a good feel for it after a few tries. Look for a thicker consistency and remember that it will continue to set as it cools.
Summer Berry Chia Jam
Created by: The Simplecooktips Team
Recipe Type: Sweet Treats
Skill Level: Beginner
Final Quantity: 2 cups
What You'll Need
Ingredients
- 1 cup fresh berries (strawberries, blueberries, raspberries, or a mix)
- 2 tablespoons chia seeds
- 2 tablespoons honey or maple syrup (adjust based on berry sweetness)
- 1 tablespoon lemon juice
How-To Steps
Wash and lightly mash the berries with a fork in a medium saucepan. You can leave them a bit chunky if you like some texture, but make sure they’re broken down enough to release their juices.
Over medium heat, add the mashed berries to the pan. Stir in the honey or maple syrup and lemon juice. Bring this mixture to a gentle boil and keep stirring for about 5 minutes, or until it starts to thicken up a bit.
Remove the pan from heat and stir in the chia seeds. They will help thicken the jam and give it that nice gel-like consistency. Let it sit for about 10 minutes to allow the chia seeds to absorb the liquid.
Once it's cooled down, transfer the jam into a clean jar. You can enjoy it right away, but it's even better after chilling in the fridge for a few hours. It should keep well for up to two weeks.
Nutritional Breakdown (Per Serving)
- Calories (kcal): 90
- Total Fat (g): 1.5
- Saturated Fat (g): 0.2
- Cholesterol (mg): 0
- Sodium (mg): 1
- Total Carbohydrates (g): 20
- Dietary Fiber (g): 5
- Sugars (g): 10
- Protein (g): 2